In Impos Version 5.37, a new functionality has been developed that allows your system to have an unlimited amount of Price Sets.
This allows you to have different prices for different days of the week, hour by hour, or to apply a special deal to your Members. Price sets can also be set to be either a percentage increase/decrease, or a dollar increase/decrease.
To set up your new Price Sets, head to Back Office and select ‘Price Sets’ from ‘Menu Details’.

You can create a new Price Set or review existing Price Sets. For this tutorial, we’ll create a new Price Set by first selecting the ‘New Item’ button, and entering a Price Set name.

Once you’ve named the new Price Set, select ‘Add’. To populate the Price Set select it from the left-hand side.
Price Sets have the ability to either individually set prices per item, or select one of the pre-set types that will alter the price verses the default Price Set. The type of Price Set will increase or decrease the price of the items selected, either by Department or by Category.
For the example below, we will select out Coffee Category to be decreased by 25%.
We’ll select the type of Price Set to be a percentage decrement. The value is entered to the right of this (we’ll enter 25).
Select the Category to apply the Price Set to and select ‘Use Default Price for Unselected Items’.

Clicking ‘Apply’ will populate the price points in this new Price Set.
Please note, the Price Set is not dynamic. If you change the default prices it won’t alter all price levels, it is only correct at the time of pressing ‘Apply’ on this screen. The creation of new items or alteration of default prices must be followed with an additional application of the Price Set rules on this screen.
To view what has been created, you can head to the Item Edit screen in the Menu Details drop down of Back Office.

By clicking on the ellipsis next to ‘Default Price’, the Price Set window will appear on the right side, which will show the active price sets and the prices for that item for that price set.
Please note: if the price listed in the alternative price set is $0.00, the system will revert to whatever price is in the Default Price Set. In order to charge $0.00 for an item just for a particular Price Set, you’ll need to check the tick box that indicates that it really is free.
Once the Price Sets have been set up, we’ll walk through how to set up a Price Action and a rule in order to have the system automatically shift to an alternative Price Set based on day/time.
Later in this tutorial we’ll cover how to push Price Set alterations by Membership types, and by sub-lists.
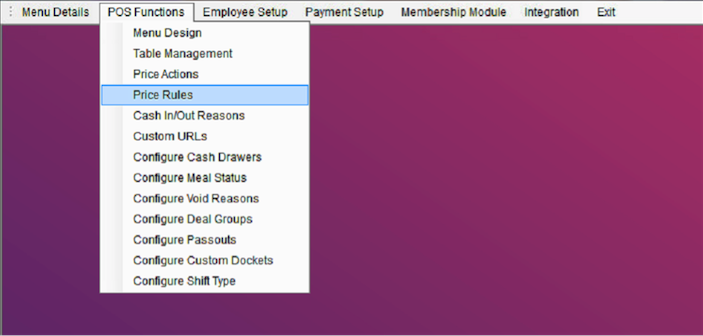
To create a time-based rule in Back office, head to POS Functions and select ‘Price Actions’.
A ‘Price Action’ is simply a name given to moving to a Price Set. For example, the name of the Price Set is ‘Training Price Set’, however the Price Action might be ‘Move to Training Set’.
When creating a Price Action, there is also a description field to assist you later in tracking what actions get applied. Enter a name for the Price Action, then select the ‘Value’ of the Price Action. This is the Price Set it will move to. For this example, we’ll select ‘Training Default Price’.

Click ‘Save’ and we have successfully created a Price Action. Now to define when this action is applied, we’ll head to Price Rules. This selection is available in the POS Functions drop down.

The Price Rule defines when and where the Price Action is applied. In this example, we’ll create a Price Rule that applies our ‘Training Price Set’ on Tuesdays between 5pm and 7pm on all of our POS stations.
First, select ‘New’ to create a new Rule. The Rule Number is generated automatically by the system.
Next, we need to select the Action Group, which is the name of the Price Action that will be applied. We’re going to select the one we just created, the ‘Move to Training Set’ Price Action. Next, select which POS stations to apply this Rule. The default is ‘All Stations’.

Then we’ll need to define the dates/times/days of the week that the Rule applies. A Rule can simply apply from one date until the end date, however we’d like to apply this only on Tuesdays. We’ll need to define a date range regardless, as this Rule may only apply for the next few weeks.
Once we’ve selected a date range, select the checkbox for ‘Specific days of the week and times of day’. We’ll be able to apply this Rule between the dates, but only on specific days. In this case, define the start and end time to be 1700 – 1900, then select the day of the week that this will apply. As you build your Price Rules you will be able to apply the same rule at different times of the day on different days of the week. However, for this example it will just be one day. Once completed press ‘Save’.

Once saved, this Price Action will appear in the Current Rules section at the top of the Price Rules page. You can edit this at any stage.
The Front Office system will automatically move from the Default Price to the selected Price Set during the assigned dates/times. This information will be displayed in Front Office, just above the Check Totals.
Sub-Lists: In order to create a Sub-List that selects a Price Set, head to the Menu Details drop down in Back Office and Select ‘Sub-Lists’.
In the Sub-List setup screen, you’ll be able to add new Sub-Lists or edit existing. For this example, we are going to assign a Price Set to an existing Sub-List. First, select a Sub-List from the panel on the left. Once the list has been selected, you’ll be able to add a Price Set to it by selecting it from the ‘Price Set Overview’ dropdown.

Once selected, confirm and save by choosing ‘Update’.
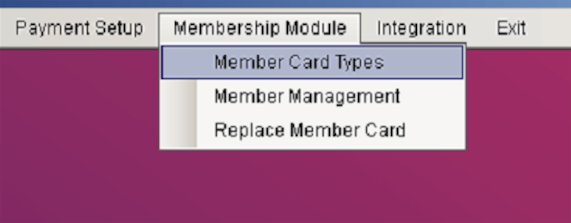
Membership: to use a Membership to alter the Price Set applied at the time of sale, head to the Membership Module drop down in Back Office and select ‘Member Card Types’.

Select a Member Card type from the panel on the left to edit. You’ll be able to assign a Price Set to this type of Member by selecting the Price Set from the ‘Price Set’ drop down.
Please bare in mind that the Member has to be assigned to the sale before the Items are selected in Front Office for every transaction associated with that Member.

Notes: Price Sets can be set as ‘In-Active’, however this can only occur if there are no Price Actions referencing this Price Set.
Any questions please contact Impos Support on 1300 780 268.